
[Xbox Scene] RetroPass v1.8.1 Released Now Supporting XBSX2 Emulator Version 2.0
Released a new update for RetroPass , the frontend for RetroArch , RetriX Gold , Dolphin , XBSX2 and Xenia Canary running on Xbox One and Xbox Series X/S consoles now includes support for version 2.0 of the XBSX2 emulator .
RetroPass cannot be configured directly from the Xbox console , this is because it doesn’t have a built-in scraper and setting all the configuration directly on the Xbox would be quite difficult.
However RetroPass is made compatible with:
- LaunchBox.
- EmulationStation.
Limitations
- Xbox only.
- Optimized for gamepads only.
- No custom themes.
- Zipped content supported only if RetroArch or RetriX Gold cores support it.
- No scrapers.
Prerequisites
- Xbox and console developer accounts set up for developer mode.
- If you are using RetroArch – version v1.10.1. or higher.
- If you are using RetriX Gold – version 3.0.19. or higher.
- For a seamless experience, we recommend setting up a hotkey to exit RetroArch. When content is launched from RetroPass, once the user exits RetroArch with the hotkey or through the menu, they will immediately return to RetroPass.
- External storage of any type used for setting up the content library.
- Additional computer for setting up the content library.
Installation
- Download the latest RetroPass binaries.
- Connect to Xbox via Xbox Device Portal and install:
RetroPass_x.yz0_x64.msix- 3 appx dependencies in the
/Dependencies/x64/.
Configuration with Launchbox
LaunchBox is the preferred option, as it gives the best results when configured correctly. Mainly:
- Support for multiple game titles and screenshots.
- Set a specific core for a game if needed.
- Install LaunchBox directly to external storage.
- Install and configure LaunchBox to work with RetroArch or RetriX Gold.
- IMPORTANT!!! When you import your content, you will be asked to select the type of media to download. If you’re only using LaunchBox to set up RetroPass, you don’t need to download all media types because RetroPass only needs a subset. It will speed up the setup process and put less burden on the LaunchBox database. You just need to check out these types of media:
- “Box-Front”.
- “Screenshots – Game Title”.
- “Screenshots – Gameplay”.
- “Screenshots – Game Select”.
- “Video”.

- Make sure the property
<CommandLine>for each emulator is configured correctly in theLaunchBox/Data/Emulators.xml. The path doesn’t matter, as long as the principal name is specified correctly. RetroPass ignores the path part and just gets the core name. He knows how to properly pass it to RetroArch or RetriX Gold.
<CommandLine>-L "cores\<core_name>.dll"</CommandLine>
Where <core_name>is the name of the core you want to use for a particular emulator.
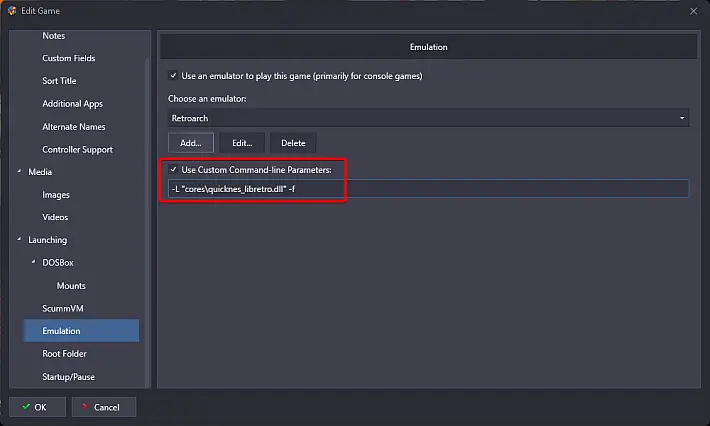
- Optionally, if you need to configure a different core for a game, go to Launchbox, open “Edit Metadata/Media” and change the command line to Emulation.
- Download the Retropass configuration file and copy it to the root of the external storage.
- Edit the configuration file
RetroPass.xml.
<relativePath>points to the LaunchBox directory in external storage. Do not enter an absolute path such as “E:\LaunchBox”, because when external storage is connected to the Xbox, it may be recognized with a different letter. For example, if the LaunchBox folder is in the root of the external storage, it should be configured like this:
<? xml version = " 1.0 " ?>
<dataSource> _ _
	<type> LaunchBox </type> _ _
	< relativePath >./LaunchBox</ relativePath >
</dataSource> _ _
- At this point the configuration is complete. Plug the external storage into the Xbox and launch RetroPass. Follow the First Run and Settings section .
Installation with Emulation Station
If you don’t want to use LaunchBox, you can also create an Emulation Station compatible metadata source.
- Install and configure Emulation Station to work with RetroArch on PC, preferably directly to external storage.
- Download all images, descriptions and videos. There are various scrapers that can download assets from various databases and send them to
gamelist.xmlEmulation Station files. - Edit the configuration file
RetroPass.xml.
<relativePath>points to the Emulation Station directory on the external storage. Do not enter an absolute path such as “E:\EmulationStation”, because when the external storage is connected to the Xbox, it may be recognized with a different letter. For example, if the EmulationStation folder is in the root of the external storage, it should be configured like this:
<? xml version = " 1.0 " ?>
<dataSource> _ _
	< type > EmulationStation </ type >
	< relativePath >./EmulationStation</ relativePath >
</dataSource> _ _
- Verify that the file
es_systems.cfgexists somewhere in the Emulation Station directory and has valid systems defined, i.e.:- Ignore the property
<path>, it doesn’t have to be set correctly. - Make sure the ownership
<command>for each system is configured correctly. Paths are not important as long as the principal name is specified correctly. RetroPass ignores everything on the command line except the root name. It knows how to pass it to RetroArch correctly. <fullname>it is what is actually displayed in RetroPass as the system name.- In the following example, only the relevant properties are shown:
- Ignore the property
<system> _ _
	< name >nes</ name >
	< fullname >Nintendo Entertainment System</ fullname >
	< command >-L %HOME%\\systems\nestopia_libretro.dll</ command >
	<platform> nes </platform> _ _
</system> _ _
- Set the file
gamelist.xmlfor each system:gamelist.xmlmust be in your own directory which is equivalent to<name>the system defined ines_systems.cfg. For example, based on the example in step 3, it is expected that for NES it should be/nes/gamelist.xml.- All paths defined in
<path>,<thumbnail>,<image>,<video>must be a relative path to<relativePath>defined in step 3. For example, if theRetropass.xmlrelative path is:<relativePath>./EmulationStation</relativePath> - AND
	< game >
		<path> ./contents/nes/Elite.nes </path> _ _
		<name> Elite </name> _ _
		< desc >The player...</ desc >
		< thumbnail >./downloaded_images/nes/covers/Elite-thumb.jpg</ thumbnail >
		<image> ./downloaded_images/nes/Elite-image.jpg </image> _ _
		<video> ./videos/nes/Elite.mp4 </video> _ _
		<released> 19910101T000000 </released> _ _
		<developer> David Braben, Ian Bell </developer>
		<publisher> Imagineer Co. , Ltd. </publisher>
		<genre> Action , Shooter </genre>
	</ game >
- So the full path to the thumbnail would be:
./EmulationStation/downloaded_images/nes/covers/Elite-thumb.jpg
- At this point the configuration is complete. Connect the external storage to the Xbox and launch RetroPass. Follow the First Run and Settings section.
First run and settings
- If the RetroPass configuration file is found and configured correctly, the Settings screen is displayed:
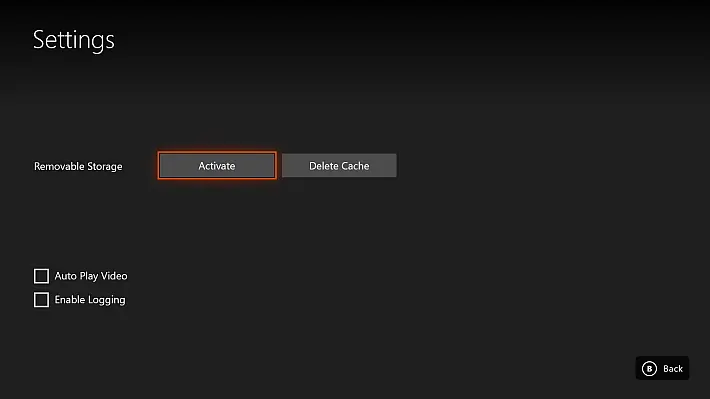
- Click the Activate button and then click Back.
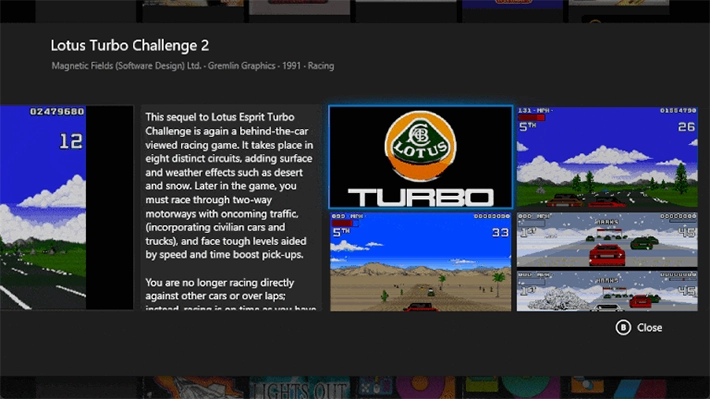
- You should see a list of platforms and content:
- Clear Cache deletes all cached thumbnails, but also the Play Later playlist.
- Auto Play Video automatically plays a video when content is selected.
- Enable logging enables logging. See the Troubleshooting section for more information.
Checks
 – Confirm.
 – Back, previous screen, close dialog.
 – Add/remove title from/to Play Later playlist.
 – Show the search screen.
 /
/  – Opens the Log screen, only in the Settings screen.
- Menu/Start – Starts content immediately, works on Home screen and Collection screen.
troubleshooting
If you don’t see your content after installation and setup:
- Go to Settings and select Enable Logging .
- Exit RetroPass and restart it.
- Go to Settings and press the button ( ) on the Xbox gamepad.
- View the log and notice the yellow warning and red error log entries.
- The log file is also generated in the local RetroPass folder on the Xbox
Make sure you turn off logging after troubleshooting, because writing to a log file slows app performance.
Thumbnail cache
- RetroPass uses its own thumbnail caching system, so it has explicit control over the thumbnails cached and the memory used. Native Windows thumbnail caching is not used.
- Cached thumbnails can be deleted by opening the Settings page and clicking the Delete Cache button .
- When front box images are to be shown for the first time, they are first cached in a smaller thumbnail for faster loading later. This means that when you access the platform collections, the loading of the images will be slower until the thumbnails are generated.
- Currently, there is no memory management for the thumbnails shown. Uploaded thumbnails remain in memory until the app is closed. This makes viewing collections really fast once they load, but could potentially crash your app if you have a large number of systems with huge collections.
Changelog
- Added support for XBSX2.0 emulator.
Download: RetroPass v1.8.1
Download: Sourcecode RetroPass v1.8.1
Source: github.com