
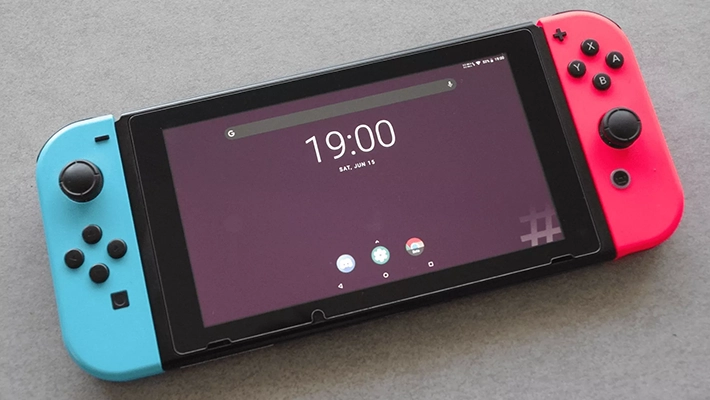
[Switch Scene] LineageOS 18.1 (Android 11) First Beta Released for Switch Consoles
The Switchroot team brings Android 11 to Switch consoles, releasing a first beta of LineageOS 18.1 , the ROM is based on a build for Nvidia Shield TV .
LineageOS is a popular custom ROM based on the Android Open Source Project (AOSP) operating system . Its history dates back to the CyanogenMod project , a highly customizable and widely used ROM in the past.
One of the main new features of this version of LineageOS is the switch to Lineage Recovery as the default recovery, replacing TWRP . However, TWRP is still available as a separate image for those who prefer to use it.
Additionally, Google Mobile Services (GMS) are supported, allowing users to access Google services and apps right on their Switch console. This opens up new possibilities for using applications and games that require access to Google services.
Switchroot has also been working on optimizing and improving the user experience. Dock support has been implemented, allowing you to easily connect your console to your TV.
Furthermore, the Pro version of the Console Launcher is available for free to all users, offering a customizable interface and advanced features.
The theme has been adapted and improved, ensuring a consistent look in all apps, and the button recognition has been corrected in several applications, improving the browsing and gaming experience.
The development team also made many changes to the kernel of L4T (Linux for Tegra), which resulted in better overall system performance and stability.
Importantly, this version of LineageOS is still in beta stage and may have some known bugs. For example, there may be problems with docking and screen resolution.
However, the development team is striving to release updates to address these issues and improve the overall experience.
Characteristics
- Updated to Android 11/LineageOS 18.1.
- Switching to Lineage Recovery as the default recovery : Lineage Recovery replaces TWRP as the default recovery. However, it is still possible to use TWRP as a standalone flashable image.
- Support for all Mariko models : The ROM supports all Nintendo Switch Mariko models, including v2, Lite and OLED.
- Bootloader migrated to L4T-Loader : The bootloader has been migrated to L4T-Loader, providing a smoother and improved experience.
- Integrated GMS : Google Mobile Services (GMS) has been integrated into the ROM, allowing access to various Google apps and services.
- GL Desktop Support : Added GL desktop support, allowing OpenGL-based applications and games to run on an external display.
- Full hardware compositing/overlays : Full hardware compositing and overlays are supported, allowing for a better visual experience even while docking.
- Overclocking profiles added via hekate ini entries Overclocking profiles have been added via hekate ini entries, allowing you to customize system overclocking settings.
- JoyCons work in more apps : JoyCons are now supported in more apps, including GeForce Now, providing a more complete gaming experience.
- Shield Stock Content Update : Shield stock content, firmware, and more have been updated to Shield Experience version 9.1.1.
- Wi-Fi support and consistency improvements : Wi-Fi support and consistency have been significantly improved, reducing the number of disconnects and offering better connectivity.
- Device Settings Improvements : The device settings have been improved, now called Switch Configuration, and offer new configuration options for JoyCons and other features.
- Docking Support : Docking is supported both with and without internal panel mirroring, giving you more viewing options.
- Built-in Console Launcher : Built-in a Console Launcher in the ROM, which includes a free Pro upgrade for all Switchroot users. It offers a customized interface and additional options.
- Integrated touch keyboards and controllers : Both touch keyboards and controllers are integrated into both the Android TV (ATV) distribution and the tablet distribution, offering more input options.
- Switchroot Theme : Introduced a Switchroot theme that includes a custom wallpaper and unique color scheme.
- Fixes for Button Registration on Nintendo Controllers : Fixes have been made to improve button registration on Nintendo controllers in several apps.
- Other QoL Improvements and Fixes : Numerous other changes and fixes have been made to improve the overall user experience. For more details, you can consult the commit logs.
Requirements
- A Nintendo Switch console with support for the RCM exploit : To perform the installation, the console must be “RCM-exploitable”, ie that it can be started in RCM (Recovery Mode). You can take advantage of the RCM exploit using an appropriate jig or other available methods. It is important to note that Switchroot does not endorse or is affiliated with the manufacture or development of modchips, so for support and recommendations regarding modchips, you should look elsewhere.
- Computer : You will need a computer to run the LineageOS installation process.
- At least 16GB high-quality microSD card : To install LineageOS, you will need a high-quality microSD card with a capacity of at least 16GB. Make sure you use a reliable card to avoid problems installing or using the operating system.
- microSD card reader for your computer or USB-C cable for Hekate UMS : To connect your microSD card to your computer, you will need a compatible microSD card reader or USB-C cable to use UMS (Mass Storage Mode) by Hecate.
Before proceeding with the installation of LineageOS 18.1 on Nintendo Switch, it is important to meet some prerequisites as well.
- Remove any Switchroot Android O/8.1 installations or development builds of P/9, Q/10, or R/11: If you have previous versions of Switchroot installed, be sure to delete the installation completely before proceeding with installing LineageOS 18.1. This step is important to avoid conflicts or problems during installation.
- Format the SD card: Make sure the SD card is formatted as FAT32 or exFAT. During the partitioning process, the SD card will automatically be formatted as FAT32 as you need to boot Android or L4T Linux.
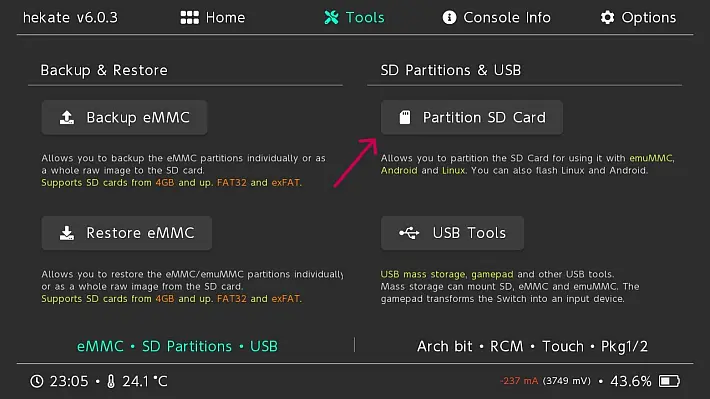
- Update Hekate: Make sure you have Hekate version 6.0.3 or later installed before attempting to install LineageOS 18.1.
Installation
- Download the latest version of the Hekate bootloader ( link provided ) and download the latest version. The archive should have a name similar to .
hekate_ctcaer_[versione]Nyx[versione].zip - Unzip the Hekate Archive: Once the Hekate archive is downloaded, unzip it on your PC.
- Copy Hekate to SD Card: Take the SD card you intend to use on the Nintendo Switch console and insert it into your PC. Copy all the files and folders extracted from the hekate archive to the root of the SD card. Be sure to replace any existing files or folders with new ones.
- Download the latest archive of nx-tab or nx-atv: On the site provided, you will find two options for download: nx-tab (standard Android tablet) or nx-atv (Android TV). Choose the one you prefer and download the corresponding zip archive.
- Copy the zip archive to the SD card: Take the zip archive you just downloaded and copy it to the SD card, root or an easily accessible location.
To prepare the Nintendo Switch console and launch Hekate, follow these steps:
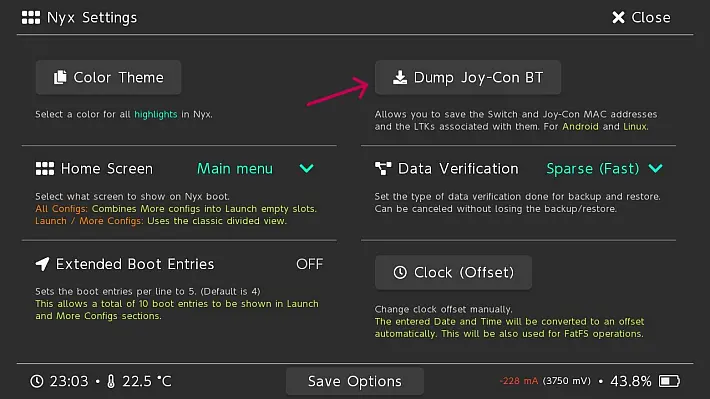
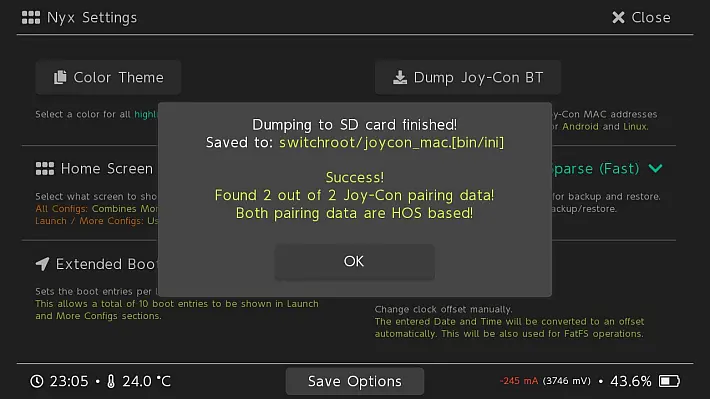
- Make sure the Joy-Cons are paired with the Switch console when running HOS (Horizon OS/Switch OS). This is required for controller binding.
- Insert the SD card into the Nintendo Switch console.
- If you own an unpatched 1st Generation Nintendo Switch console (v1), follow these instructions:
- Take the RCM jig, which is a small, thin tool that is used to initiate the RCM mode of the Nintendo Switch console.
- Scroll the RCM jig in the right guide on the underside of the Nintendo Switch console.
- Connect the Switch console to your computer using a USB-C cable and turn off the console.
- Simultaneously press the Power button and the Volume + button to enter RCM mode. Hold both buttons until you see the black screen.
- Once in RCM mode, inject the Hekate payload using the file
hekate_ctcaer_[versione].bindownloaded earlier. You can do this using a payload injection tool like TegraRCMGUI or through a dedicated website. If you’re using the website , open Google Chrome (compatible with Chrome only) and select “Upload .bin payload”, then select the payload file and click “Do the thing!” and choose “APX” from the pop-up menu. - Once booted into Hekate, you can remove the RCM jig from the Nintendo Switch and proceed to the next step.
- Boot into the HOS operating system and make sure the Joy-Cons are properly paired with the Nintendo Switch console.
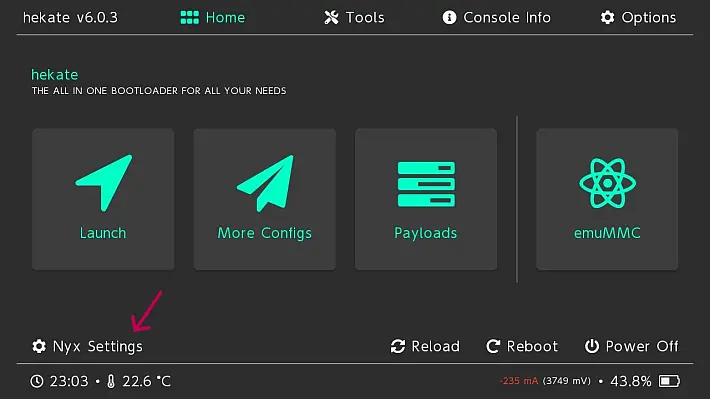
- Start Nyx Settings, which is the management interface of Hekate. You can access it directly from the Hekate main menu.
To select the appropriate space for each operating system and add the ROMs in the SD card, follow these steps:
- Using the cursors, select the appropriate space for each operating system. It is recommended that you dedicate at least 16GB for Android, although you can use it with around 8GB. Once the desired space has been selected, press “Next Step”.
- NOTE: This step creates multiple partitions for a standard AOSP layout. If you are interested in more information on this, you can consult it HERE .
- If you want to back up the Nintendo folder or other CFW files, you can do so using Hekate’s UMS SD tool via USB-C or by removing the SD card and reading the files directly on a PC. Hekate/Nyx also offers the ability to backup and restore up to 1GB of data from your existing file system.
- Connect the Nintendo Switch console to the computer using a USB-C cable and select “SD UMS” in the Hekate menu to mount the SD card as a storage drive on the computer.
- Download the zip file of the desired ROM (nx-tab for a standard Android tablet or nx-atv for Android TV) and extract it to the root of the SD card.
To add more zips and enter recovery mode, follow these steps:
- Make sure Google Play and GMS minimal are already included within the installation. No need to flash other Gapps.
- If you have other flashable zips, place them in the root of the SD card.
- Safely remove or eject the UMS SD device from your computer.
- Return to the Nintendo Switch console and select “Android Flash” from the Hekate menu. Accept the reboot prompt to enter recovery mode.
- Once in recovery mode, select “Factory Reset” and format your data and system.
- Go back into the recovery menu and select ‘Apply update’ then ‘Choose from SWITCH SD’.
- Install the Lineage zip and any other zips you may need to install. Select “Restart” and then “System”.
After the first launch, the Nintendo Switch console may need to be restarted to automatically pair the JoyCons downloaded to Android.
To start Lineage 18.1 on subsequent power-ups, follow these steps:
- Start Hekate and select More Configs –> Switchroot Android 11.
- Hold the VOL + button on choosing this option to go back to recovery mode and flash the other zips.
- Press and hold the VOL button – on choosing this option to return to Hekate without having to re-introduce a payload.
If you run into any problems or need support, follow these tips:
- Get a screenshot from SD Info in Hekate and send it as a first troubleshooter.
- If you experience unwanted behavior while already running Android, try providing a log, you can do this by installing adb on your computer, enabling USB debugging in the Nintendo Switch developer options, and then running the command on your computer
adb logcat > switchroot.log. If you prefer a simpler solution, you can submit a bug report from the developer settings. - Send the screenshot and logs, if necessary, to the Switchroot team’s Discord server. The invite link to the Discord server is available on their support page.
Known issues
- Problems with anchoring that require unhooking and re-hooking.
- Wrong default settings for docking resolution.
- Issues with IMU (inertial measurement unit) on all devices except those with IMU STM.
- CEC (Enhanced Composite Console) does not work.
- Volume UI issues due to a platform bug.
- Lack of support for RSMouse.
- My Shield TV’s remote control trackpad doesn’t work.
- Framebuffer recording doesn’t work properly in U-Boot, so if you experience lockups caused by incorrect card initialization, you may not see any error messages. This issue should be fixed in a future update.
- adb, mtp, etc. do not work when USB3 is disabled.
- Some crash or immediate restart issues may occur during the first boot after an in-place upgrade. This should be temporary and can be safely ignored.
- Reports of poor performance on Erista devices (old generation NVIDIA Tegra chipset). It is recommended that you try a clean install if you experience performance issues and be aware that there may be some generic performance issues with Erista devices. If the cause is identified, it will be fixed in a later update.
It is recommended to keep an eye out for future updates, as many of these bugs may be fixed with later releases of LineageOS for Switch.
Download: LineageOS 18.1 (Android 11)
Source: wiidadatabase.de